This Help topic refers to all DocuXplorer versions only when the optional QuickBooks Integration package has been purchased and installed
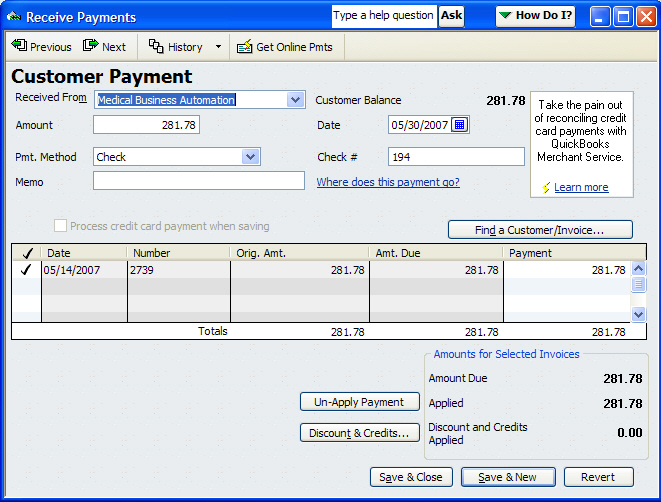
DocuXplorer will automatically index and store documents added through QuickBooks. The first step in adding documents from QuickBooks is to create a QuickBooks transaction. The transaction is created by entering the transaction data in QuickBooks and saving it by clicking on Save and New. Re-display the saved transaction by clicking on the Previous button on the QuickBooks Toolbar. Documents added to DocuXplorer through QuickBooks are then associated with that specific transaction. A user can choose to add a scanned in document using either the Quick Scan or Scanned Document methods. Electronic documents such as Word, Excel or other computer files can also be added by importing them from a folder on any local or network drive. Multiple documents can be associated with a single transaction. A search from QuickBooks using the <Find Document> menu item in <File><DocuXplorer> will display all documents associated with the displayed transaction.
To add a document to DocuXplorer from the QuickBooks menu;
Add a transaction in QuickBooks
Click Save and New
Click Previous on the QuickBooks Toolbar

or
Select any previously saved transaction
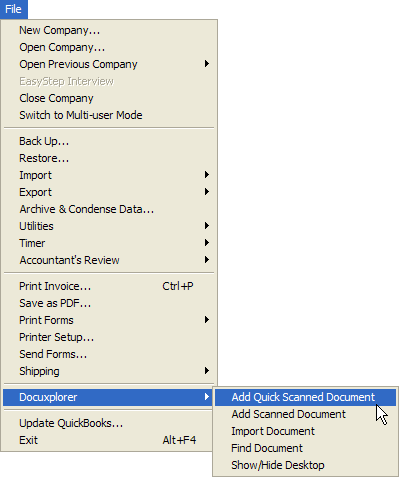
From QuickBooks select <File><DocuXplorer>

Select to add either a Quick Scanned Document, a Scanned Document using the scanner interface or to Import a document
A DocuXplorer document window will open showing the scanned or imported document on the right side of the screen and the auto-indexed data entries on the left
To complete adding the document, enter any additional index information if desired and click Save and Close
Tip:
If you change focus off the Add New Document Window before it is saved it will remain open but will placed behind other Windows open on your Windows Desktop. To view the unsaved Document Window use Alt+Tab to cycle through your open Windows to bring the Document Window to the front. you can Save and Close the document.
Document added to DocuXplorer from any QuickBooks screen not supported by DocuXplorer will be added to a Drawer and Folder titled Unknown