
This Help topic refers to all DocuXplorer versions only when the optional QuickBooks Integration package has been purchased.
The DocuXplorer for QuickBooks Integration Utility is installed as part of the Complete or Personalize option during your install.
After the install completes, open DocuXplorer and create your Library.
To integrate DocuXplorer with QuickBooks you will need to:
Install the QuickBooks Add-in program
Register DocuXplorer with QuickBooks
Import the DX-QB Index Sets into your DocuXplorer Library
Integrate DocuXplorer into the QuickBooks menus
To install the QuickBooks Add-in program after DocuXplorer's initial installation:
Open Control Panel
Select "Add or Remove Programs"
Select "DocuXplorer"
Click the "Change" button to modify the DocuXplorer installation
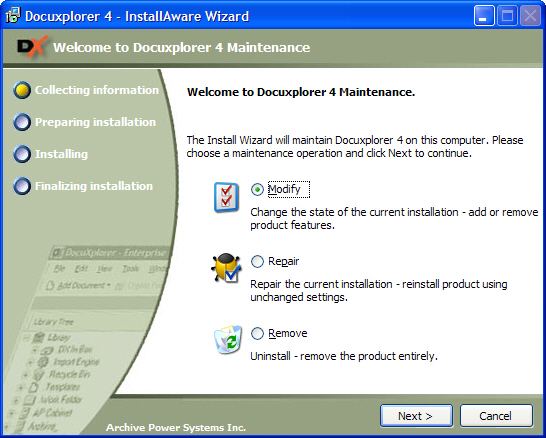
Select "Modify"
Select QuickBooks, the item might have an X over it meaning it is not installed
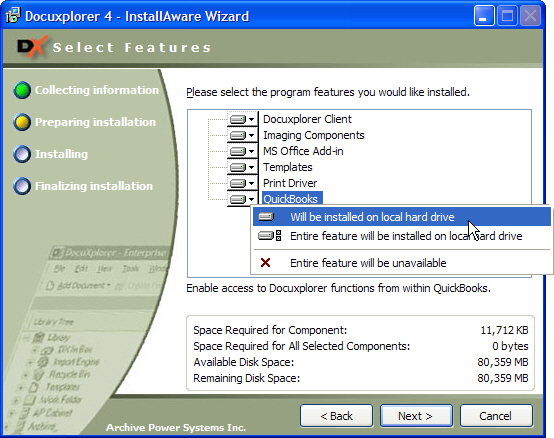
Select the first item in the pop-up menu "Will be installed on local hard drive"
Click "Next" until installed
To Register DocuXplorer with QuickBooks:
For versions of QuickBooks 2008 or greater you will to end the QB32.exe process from the task manager.
Open DocuXplorer (For Vista and Windows 7 Users right click on the DX icon and select run as Administrator)
Select on the menu bar Tools | Options | QuickBooks Defaults
Check the box Register DocuXplorer
Click Save and Close
To Import an Index Set
Open the DocuXplorer Library
Select the Library Work Folder
Click the Index Set Tools drop-down menu from the Toolbar
Select Index Set Manager
From the "Index Set" menu item select "Import Index Set"
Locate the Index Set to import using the Import Index Set browse screen. The default location for a local workstation installation is C:\Program Files\DocuXplorer\Templates\IndexSets or if Enterprise has been installed on your server, the files are under the ..\DXDOCS\DXInstall\Templates\IndexSets folder.
Highlight the QB Index Sets and click Open
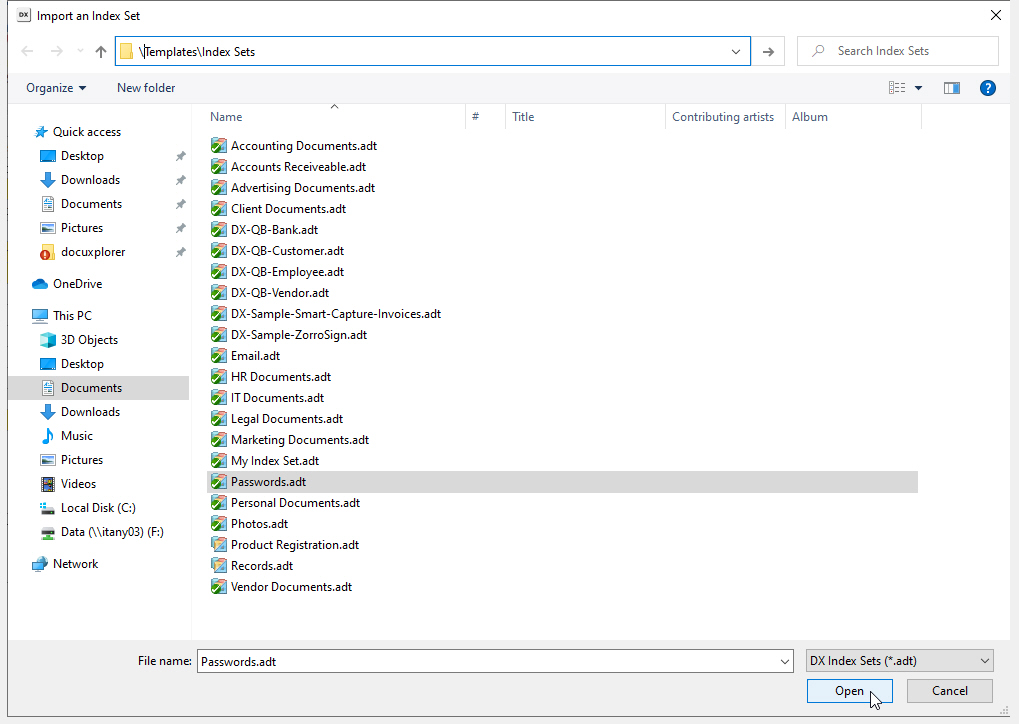
The Index Set will automatically be imported and added to the Library.
The next step in the installation process is to integrate the DocuXplorer software in QuickBooks.
In QuickBooks:
For versions of QuickBooks 2008 or greater you will to end the QB32.exe process from the task manager.
Open QuickBooks (For Vista and Windows 7 Users right click on the QuickBooks icon and select run as Administrator)
On opening a company in QuickBooks you will be presented with a screen that asks you to allow DocuXplorer access to read QuickBooks data and enhance the QuickBooks interface. The DocuXplorer integration does not modify any QuickBooks data, it merely extracts data from saved transactions to populate DocuXplorer index fields - no change is ever made to any QuickBooks data.
Certificate Information - certification is pending and the use of DocuXplorer will in no way affect the operation of QuickBooks other than to enhance its functionality.
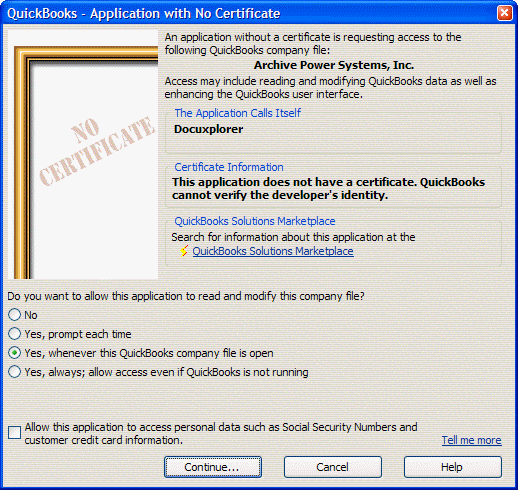
Select an option to allow DocuXplorer access to QuickBooks
No - this refuses access to QuickBooks and does not allow DocuXplorer to integrate.
Yes, prompt each time - this allows DocuXplorer to integrate but offers a prompt to allow access each time you add or find a document
Recommended - Yes, whenever this QuickBooks company file is open - DocuXplorer is able to function along with QuickBooks as an integrated document library.
Yes, always: allow access even if QuickBooks is not running - selecting this option allows DocuXplorer is work along with QuickBooks as an integrated product but since DocuXplorer does not modify or need QuickBooks to run as a standalone product, this level of integration is not required.
Allow this application to access personal data such as Social Security Number and customer credit card information - this option should be selected if you wish to pass index data such as credit card number or Social Security numbers on to DocuXplorer to index documents that are identified by this data such as: Employee documents.
After selecting an option click Continue
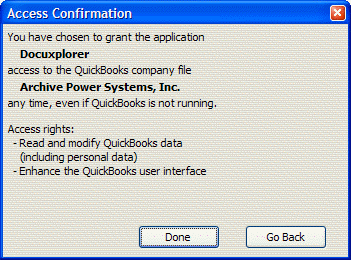
A confirmation screen will then be displayed informing you of the access rights that you have provided DocuXplorer. Click Done to complete the integration.
At this point DocuXplorer has been integrated with QuickBooks, you can use all the integration features directly from the QuickBooks <File><DocuXplorer> menu item.
Tip:
If you are installing the QuickBooks add-in to be used with a multi-user installation of QuickBooks, enter QuickBooks with the user name "Administrator" along with the Administrator password the first time you use QuickBooks with DocuXplorer. This will provide you with access to allow DocuXplorer to be integrated into the desired QuickBooks accounting database. All other steps are the same as documented.